
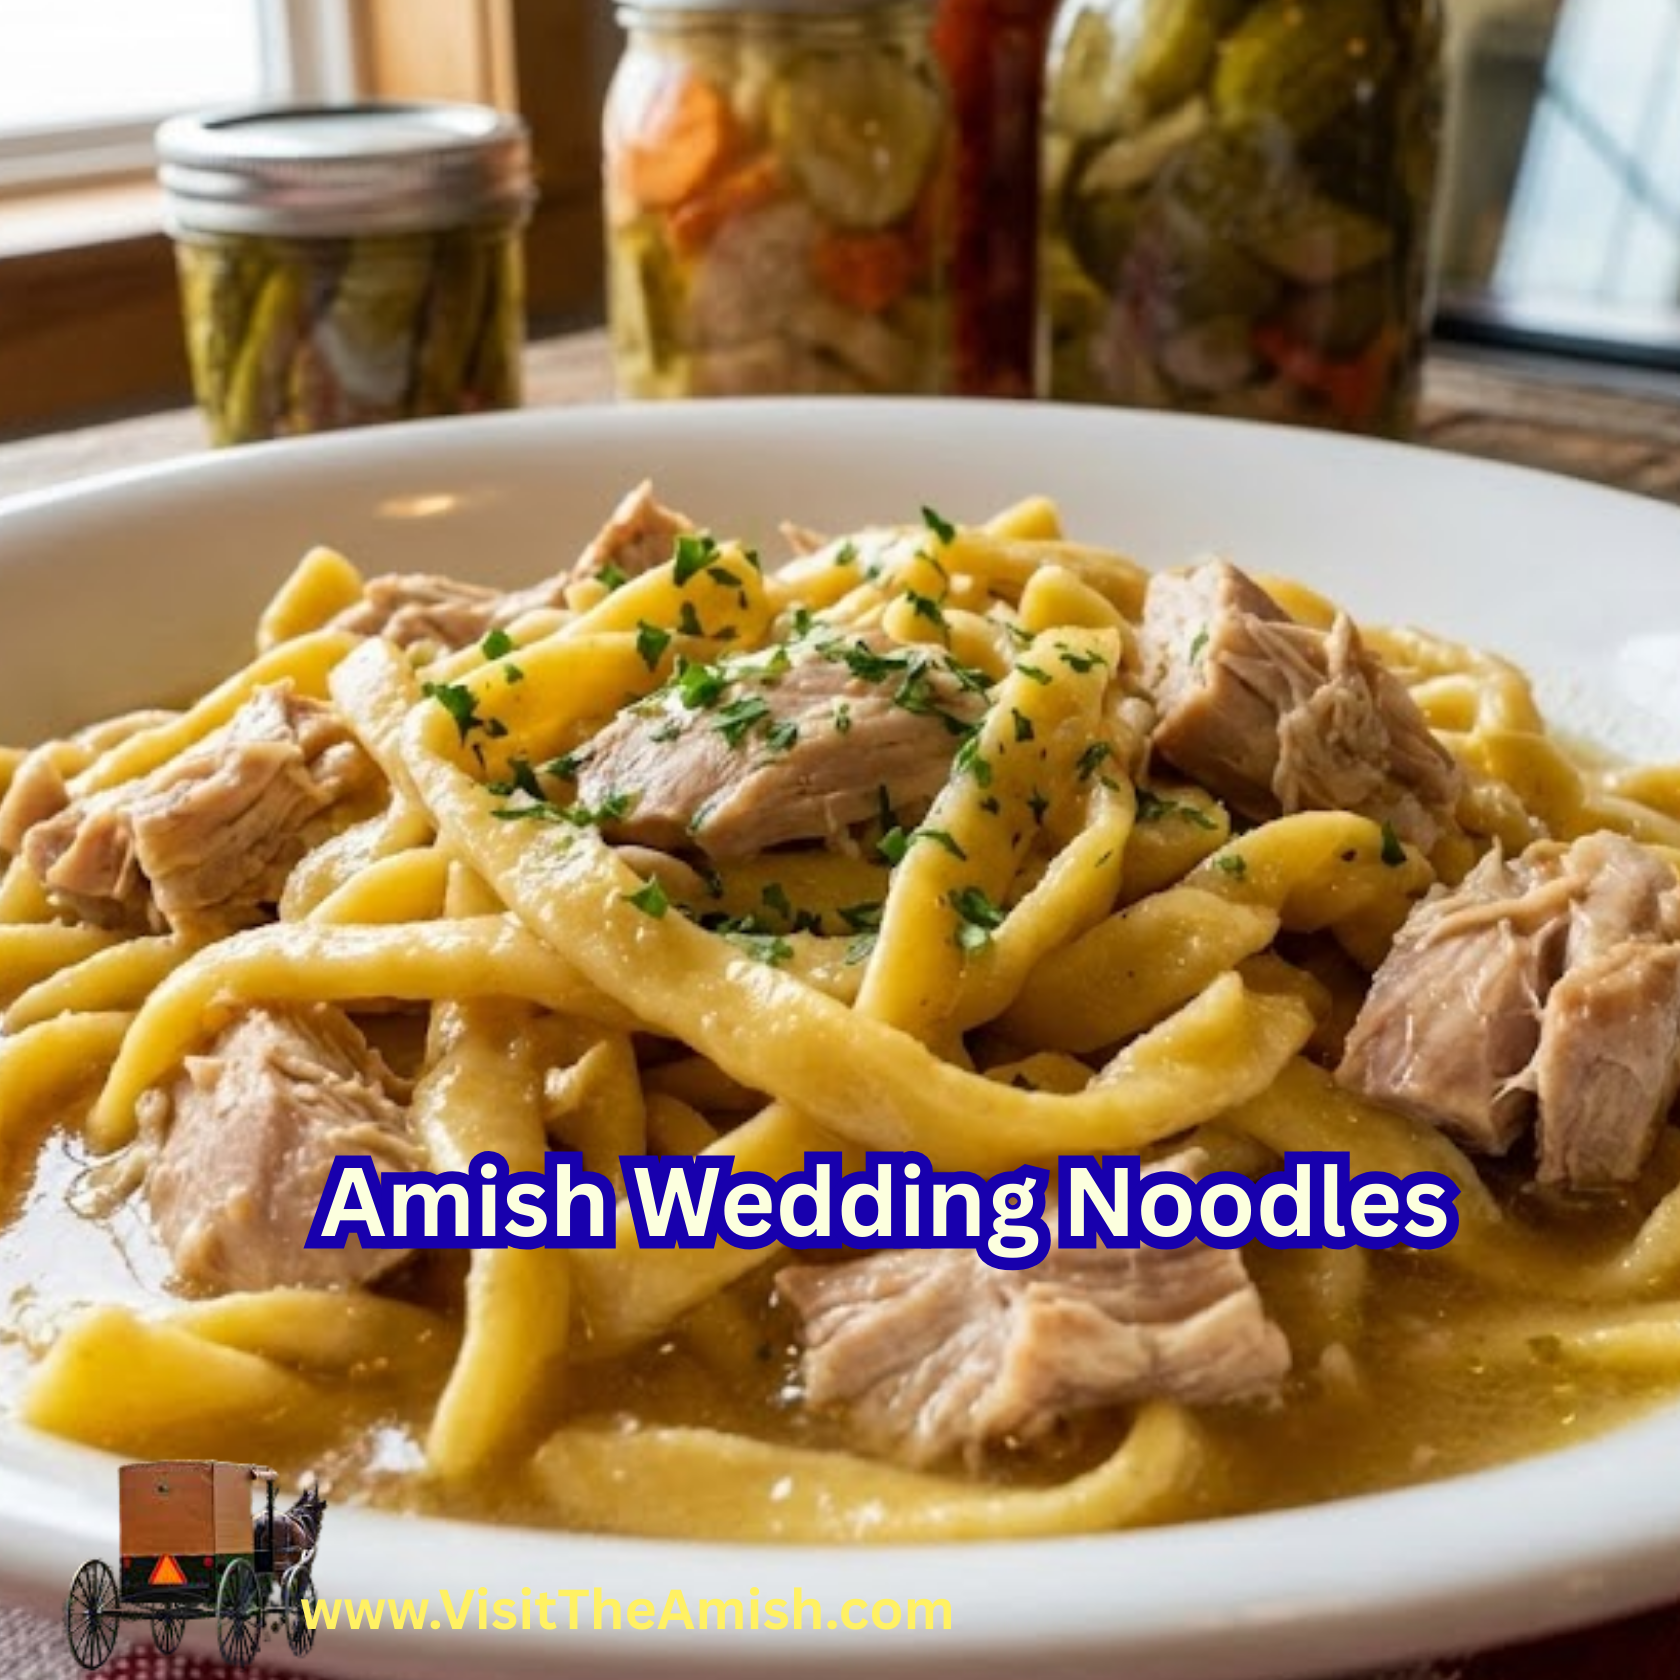
The Heart of the Feast: Authentic Amish Wedding Noodles
If you have ever visited Amish country in Pennsylvania, Ohio, or Indiana, and sat down to a traditional meal, you likely noticed something distinct about the noodles. They bear little resemblance to the pale, brittle pasta found in grocery store boxes. True Amish noodles are a vibrant, deep golden yellow. They are thick, irregular, and possess a distinctively substantial, chewy bite that somehow melts in your mouth.
These aren’t just noodles; they are the backbone of Amish comfort food, and nowhere do they shine brighter than at an Amish wedding.
The Cultural Significance of the Noodle
An Amish wedding is a massive affair, often involving several hundred guests and lasting all day. Feeding such a crowd requires strategic planning, community effort, and food that is both filling and economical.
The wedding meal is traditionally served in shifts. The menu is almost always standardized: roast chicken mixed with stuffing, mashed potatoes, creamed celery, gravy, and the star of the show—the noodles.
In the days leading up to the wedding, the women of the community gather to prepare quantities of food that would boggle the average mind. Hundreds of pounds of flour and enormous baskets of farm-fresh eggs are transformed into thousands of golden noodles. They are draped over chair backs, drying racks, and clean broom handles to air dry before the big day.
The Secret is in the Yolks
Why are they so yellow? The answer is simple: eggs, and lots of them.
Unlike Italian pasta, which often uses water or oil to hydrate the flour, traditional Amish noodles rely almost exclusively on eggs for moisture. The chickens on traditional Amish farms are usually pasture-raised, foraging for bugs and greens, which results in yolks with a deeply orange hue. It is these rich yolks that provide both the brilliant color and the velvety, rich flavor that defines the noodle.
Furthermore, these noodles are rarely boiled in plain salted water. To achieve the full “wedding noodle” experience, they must be cooked in rich chicken broth, absorbing the savory liquid as they plump up. They are often served mixed with chunks of tender chicken, blurring the line between a pasta dish and a thick stew.
Making them at home is a labor of love, but it is not difficult. It requires only three main ingredients and a little patience. The result is a bowl of pure comfort that connects you to a simpler, slower culinary tradition.
Recipe: Authentic Amish Wedding Noodles
This recipe produces a dense, rich noodle. The key step is the drying process; if you cook them immediately after cutting, they can become mushy. Let them air-dry until they feel leathery to ensure the proper chewy texture.
Equipment Needed:
- Large mixing bowl
- Rolling pin
- Pizza cutter or sharp knife
- Drying racks (or clean broom handles/chair backs covered with clean towels)
Ingredients:
- 3 cups All-Purpose Flour (plus extra for dusting)
- 4 Large Eggs (farm fresh with dark yolks yield the best color)
- 2 Egg Yolks (for extra richness and color)
- 1 tsp Fine Sea Salt
- 2-3 tablespoons cold water or milk (only if necessary)
- For cooking: 8 cups rich chicken bone broth or stock
Instructions:
1. Make the Dough Well:
On a large, clean counter surface or in a very wide bowl, mound the 3 cups of flour. Create a deep well in the center of the flour mound, like a volcano.
2. Mix the Wet Ingredients:
Crack the whole eggs and the extra yolks into the well. Add the salt. Using a fork, gently beat the eggs within the well, gradually pulling in small amounts of flour from the inner walls of the volcano.
3. Incorporate and Knead:
Continue mixing until a shaggy dough forms. If the dough is too crumbly to hold together, add cold water one tablespoon at a time until it just adheres. Once mixed, turn the dough out onto a floured surface. Knead vigorously for 8–10 minutes. The dough should be very stiff, smooth, and satin-like. It will require some muscle.
4. The Crucial Rest:
Wrap the dough ball tightly in plastic wrap and let it rest on the counter for at least 30 minutes (up to an hour). This relaxes the gluten and makes rolling much easier.
5. Roll Out:
Cut the dough into four equal sections. Work with one section at a time, keeping the others covered. On a heavily floured surface, roll the dough out. You want these thicker than Italian pasta—aim for about the thickness of a nickel.
6. Cut the Noodles:
Let the rolled sheet sit for about 10 minutes to dry slightly on the surface. Dust the top lightly with flour, then loosely roll the sheet up like a jelly roll. Using a sharp knife, slice off strips to your desired width (traditionally 1/4 inch to 1/2 inch wide). Unravel the noodles and toss them in a little flour to prevent sticking.
(Alternatively, use a pizza cutter on the flat sheet to cut long strips, then cut crosswise for shorter noodles).
7. The Drying Phase:
Lay the noodles out in a single layer on drying racks, or drape them over towel-covered chair backs. Let them air dry for at least 2 hours, or until they feel leathery and dry to the touch, but not brittle enough to snap.
8. Cooking:
Bring 8 cups of rich chicken broth to a rolling boil. Shake excess flour off the noodles and drop them into the broth. Reduce heat to a simmer. Cook for 12–20 minutes. Because of their thickness, they take much longer than boxed pasta. Taste test for doneness; they should be tender but still have a distinct chew.
Serving suggestion: Serve the noodles right in the broth, mixed with shredded roast chicken and topped with chopped parsley.