
Every small town has its legends. In the tight-knit Amish community of Grabill, Indiana, one such legend isn’t a ghost story or a historical event; it’s a cookie. It’s the Grabill Monster Cookie, and you haven’t truly lived until you’ve experienced one.
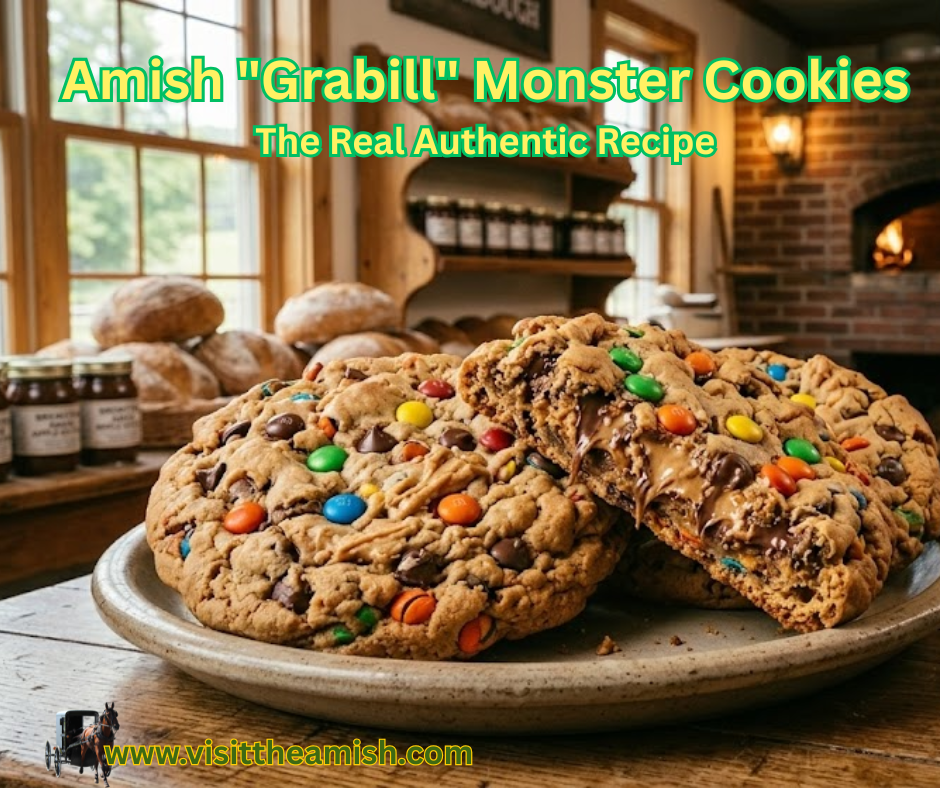
Available exclusively at the celebrated Heritage Oak Bakery—a true stone hearth institution—these cookies are the talk of Putnam County and beyond. When the bakers are pulling massive trays of golden perfection from the ovens, the aroma of molten peanut butter and chocolate drifts right through town. They are, as the sign itself declares, “Massive & Chewy!” (and priced at a very specific $4.25 each).
But what exactly is a monster cookie, and why is this filled Amish version so celebrated?
The Secret of the Ooze: Discovering the Hidden Filled Center
Standard monster cookies are wonderful—they’re the perfect, chewy merger of oatmeal, peanut butter, chocolate chips, and candy-coated chocolate pieces (like M&Ms). They are a chaotic, delicious symphony. But the true Amish “Grabill” variant does something special. It takes the concept and builds a glorious, gooey filled center right into the heart of the cookie.
Forget everything you think you know about cookie textures.
This isn’t a standard mixed-in monster cookie. The standard formula of colorful candy pieces and chocolate chips is just the external texture. The genius is what the Heritage Oak bakers are hiding inside.
If you are lucky enough to encounter one of these cookies fresh, your first bite into the chewy, standard monster cookie exterior will give way. You will break through a hidden wall. Revealed inside is a molten, flowing river of ooey-gooey, warm creamy peanut butter mixed with melted semi-sweet chocolate. This isn’t just a filled cookie; it’s a filled experience. This unique, hidden peanut butter core is the defining characteristic that turns an already great cookie into a legendary comfort food event.
It is precisely this ooey-gooey, molten center that makes these cookies so celebrated. The Heritage Oak Bakery has pioneered a special technique for embedding a frozen peanut butter disk into the dough itself, ensuring the center stays flowing while the cookie bakes perfectly around it. The result is a monster cookie that doesn’t just deliver mixed flavors; it delivers a surprise, filled event in every bite.
It’s the perfect ending to any meal, perhaps a traditional Amish slippery noodle chicken pot pie or roast beef with mashed potatoes and sauerkraut—another Heritage Oak classic.
The Recipe: Recreating the Amish Grabill Monster Cookie at Home
You can’t just mix ingredients and get this result. Recreating the filled center is a precise two-step process. The secret is to prepare the filling first and freeze it into small disks. Here is how to create this filled Amish legend.
Prep time: 30 minutes (plus 1 hour for freezing filling)
Chill time: 2 hours
Bake time: 12–14 minutes
Yields: 12–15 filled cookies
The Ooey-Gooey Peanut Butter Filling:
The filling must be sturdy enough to be embedded but gooey enough to melt while the cookie bakes. You must emphasize the technique of freezing the PB disks. This is critical for getting a filled, not just mixed, result.
- 1 cup creamy peanut butter (use standard, not natural)
- 1/2 cup powdered sugar
The Sturdy Monster Cookie Dough:
This dough must be thick and robust enough to support and seal around the filled center. The external monster cookie ingredients (candy and chocolate chips) are mixed into this dough only.
- 1 cup (2 sticks) unsalted butter, softened
- 1/2 cup creamy peanut butter
- 1 cup packed brown sugar
- 3/4 cup granulated white sugar
- 2 large eggs
- 1 tsp vanilla extract
- 1 3/4 cups all-purpose flour
- 1 tsp baking soda
- 1/2 tsp salt
- 2 cups rolled oats (not quick-cooking)
- 1 cup semi-sweet chocolate chips (or maybe milk chocolate/peanut butter chips)
- 1 1/2 cups colorful candy-coated chocolate pieces (like M&Ms)

Step-by-Step Instructions:
Step 1: Prepare the Frozen Peanut Butter Disks (The Prep Step!)
This is the most critical step. You cannot get the filled center without it.
- In a medium bowl, combine the 1 cup of creamy peanut butter and 1/2 cup of powdered sugar. Mix until smooth and sturdy (it should feel like dense cookie dough).
- Using a small cookie scoop or spoon, portion out tablespoons of the mixture. Flatten each portion into a small, sturdy disk, about 1 1/2 inches in diameter.
- Place the flattened disks on a baking sheet lined with parchment paper. Freeze them for at least 1 hour (or until solid). This is non-negotiable—if they are too soft, they will merge with the dough and you won’t get a clean filled center.
Step 2: Create the Robust Monster Cookie Dough
- While the PB disks are freezing, cream together the butter, 1/2 cup peanut butter, brown sugar, and white sugar until light and fluffy (about 3–4 minutes).
- Beat in the eggs one at a time, then stir in the vanilla extract.
- In a separate bowl, whisk together the flour, baking soda, and salt. Gradually add the dry ingredients to the butter mixture, mixing until just combined.
- Fold in the oats, semi-sweet chocolate chips, and candy-coated chocolate pieces by hand. The goal is to keep these standard monster cookie ingredients mixed-in.
- Cover the dough bowl and chill it for 2 hours (or overnight). A cold dough is easier to wrap around the frozen PB disks and bakes better.
Step 3: Assemble the Cookie and Seal the Mystery
- Preheat your oven to 350°F (175°C). Line several baking sheets with parchment paper.
- Dust your hands lightly with flour. Scoop about 3 tablespoons of cold dough (a generous portion) and flatten it into a sturdy disk in the palm of your hand.
- Place one frozen peanut butter disk in the center.
- Scoop another 3 tablespoons of dough and place it directly on top of the PB disk. Seal the edges of the two dough portions completely around the PB center, pinching the dough to ensure no filling can escape. It will form one massive, stuffed dough ball. Repeat for all cookies.
Step 4: Bake to Perfection
- Arrange the assembled cookies on the prepared baking sheets, leaving plenty of space (about 3 inches) between them—they will spread!
- Bake for 12–14 minutes, or until the edges are golden brown and the tops are set. Do not overbake—the center should remain slightly soft to ensure the PB flows.
Step 5: The Anticipation and the Bite
- Let the cookies cool on the baking sheet for 10 minutes before moving them to a wire rack. While they are still warm, you must get the ooey-gooey, molten filled center seen in the image.
These cookies are a massive, chewy experience that is best served warm with a simple cup of coffee, as pictured.
